You guys know how much I love growing herbs at home and so I have always fancied having a proper wooden herb garden, especially when I scroll through the stunning Pinterest images.
A lot of them would be DIY projects but I never considered that option as it seemed almost impossible to build a wooden structure from scratch. I did extensive online searching to find models that are feasible in my rented home but a solid wooden one (at least the kind I had in mind) was always on the expensive side.
So the idea remained a dream of mine, until recently.
As many of you already know, my parents were here visiting us for a few months late last year. Now my mom is a DIY queen and a very avid gardener too. So one day, while we were on the topic of gardening, I mentioned my desire to have a wooden herb unit, one that is practically designed yet big enough to grow many herbs at a time in small batches.
I showed her some of the designs I had in mind and she casually mentioned that it was nothing complex and quite achievable especially here, as all kinds of tools and resources are available for DIY purposes. In fact, of all the shops she visited, my mum fell in love with Bunnings!
Around this time, I got to learn more about Ryobi tools at a blogger’s event where I got an opportunity to handle their power tools and make a wooden serving platter. Even though that was a teeny weeny project that I got to do with the Ryobi experts beside me, it still gave a vague sense of ‘I think I can do it if I make an effort’, especially after those power tools made it feel real easy. An electric drill suddenly didn’t seem to be a daunting affair!
But with the excitement, came the apprehension too. What if I can’t do it? A long discussion with Sam and that inner voice telling me to try my hand at something new gave me the much needed confidence to say yes to this DIY project using the power tools supplied by Ryobi.
So without further ado, let’s jump straight in to the details of how I went about creating this beautiful wooden herb garden. And let me also inform you that this post is going to be a picture heavy one.
(I know the photographs might make you think that Sam did all the work but trust me, I did lots more than just take photographs!)
Step 1:
The right design:
Now this is a very crucial step and one you must spend considerable time on. I was looking for a design that is easy to put together yet one that is aesthetic and long term. I also wanted a structure that is portable as we are still renting and also one that can sit well in a small backyard space when we eventually get our first home.
After browsing through hundreds of images and online tutorials, I decided on this design from Garden Answer that was a perfect fit with my expectations. And their online tutorials were a great help to get a jist of how to go about the entire project.
Step 2:
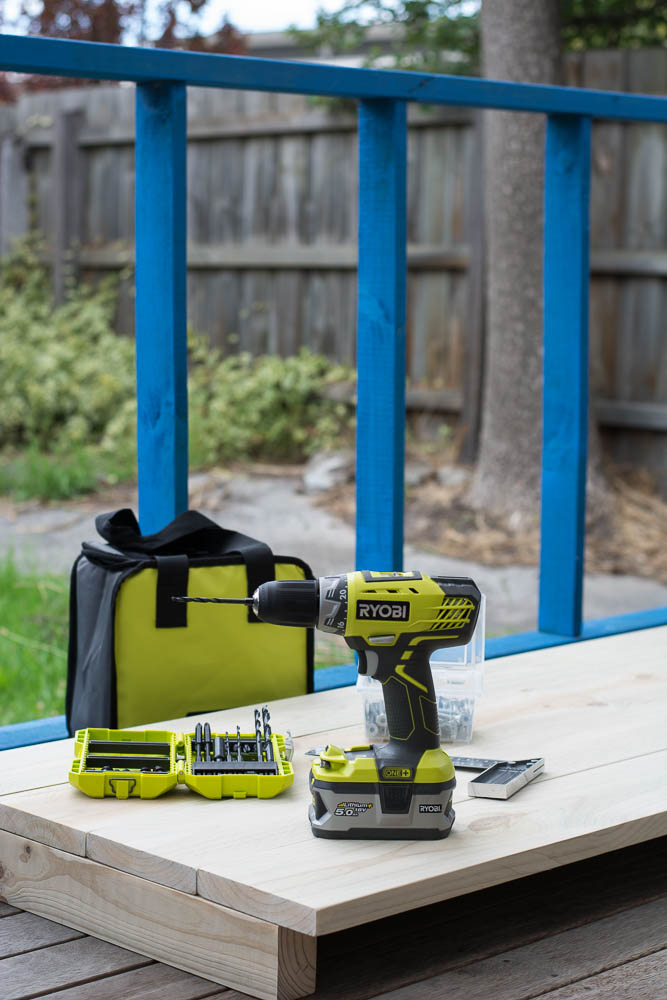
The right tools:
This is where the Ryobi expertise came handy. While I was supplied the tools, you can easily purchase all Ryobi power tools at Bunnings. The tools are quite versatile which means they always come in handy for future uses too and not just for a specific project. Apart from the instruction manual, there are also online tutorials on how to use all the Ryobi tools on Ryobi TV which is so useful and handy if you are a beginner. The tools I used for this project were;
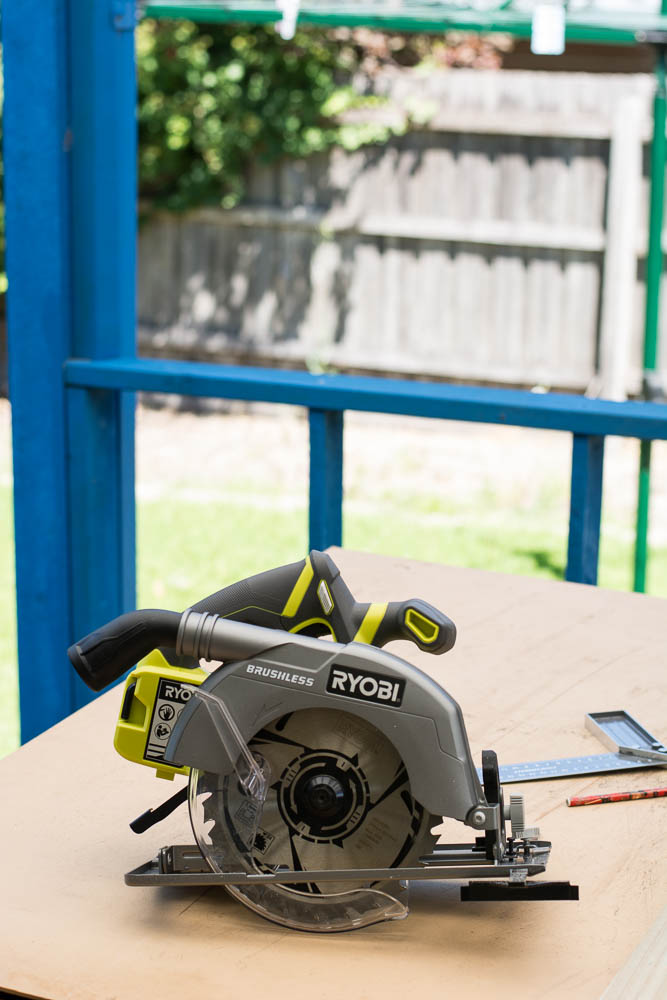
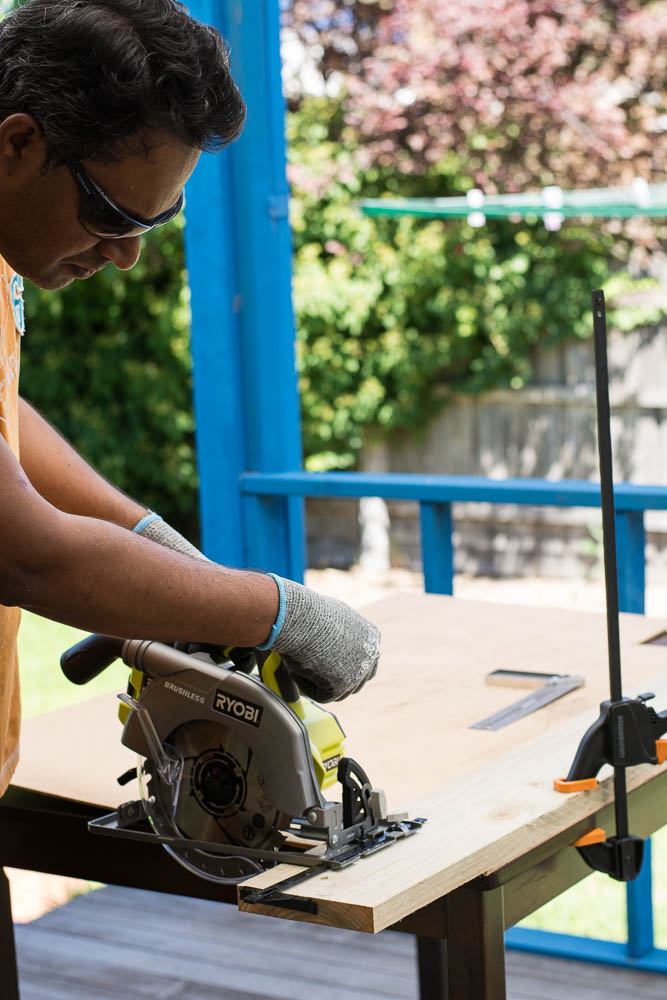
Circular Saw (1500W 184MM) (MODEL: #RCS1500-G | BUNNINGS I/N: 13549)
This mean rugged beast of a saw is surprisingly compact, not so heavy and quite easy to use. (And anyone who has seen me in real life would understand why lightweight is rather important for me). With great precision and power, this was absolutely necessary to cut out the wooden boards to the exact sizes and measurements. I was especially pleased with its comfortable grip which gave me total control to do the job.
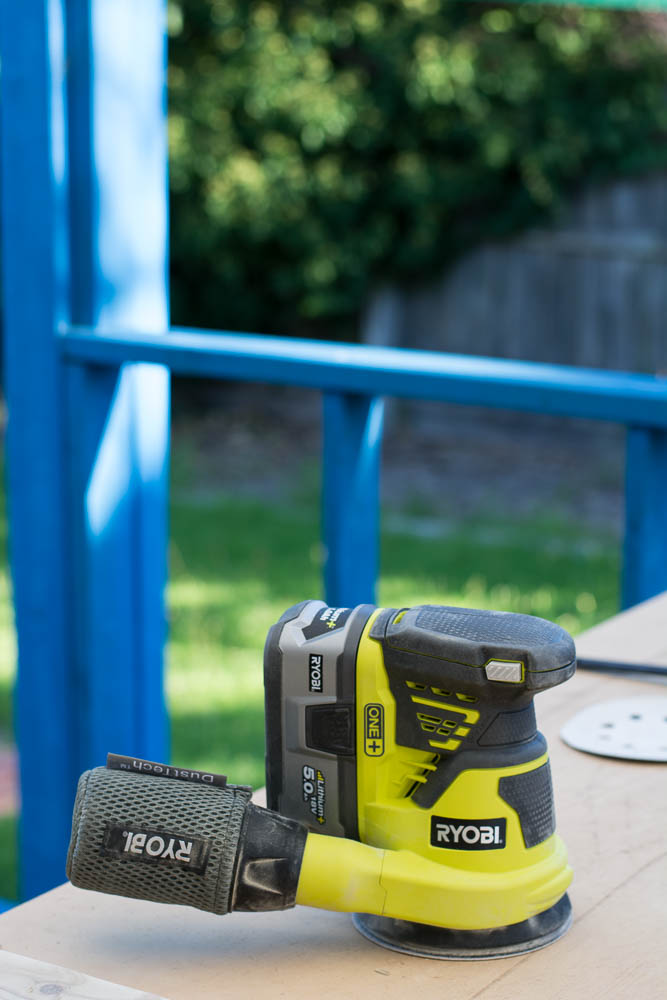
Random Orbital Sander (18V ONE+ 125 MM) (MODEL: #R18ROS-0 | BUNNINGS I/N: 6210660)
Well, the job that took me the longest time was sanding. Thank God for power tools like these because I simply cannot imagine doing the job otherwise. The orbital sander was really easy to use and with upto 80% dust pickup efficiency, I didn’t have much cleaning up to do afterwards.
18 V ONE+ Drill Driver Kit (MODEL: #R18DD-C155S | BUNNINGS I/N: 6210757)
A great drill driver combination kit for any project! Easy to use, convenient and versatile, this combo kit includes;
- 1 x 18V drill driver (RCD1802)
- 1 x 1.5Ah lithium ion battery (RB18L15)
- 1 x 5.0Ah lithium ion battery (RB18L50)
- 1 x fast charger (RC18120)
The high capacity 5.0Ah battery was a boon as I could get a lot of work done between charges. The compact design makes it very easy to use and it also has other features like variable speed control. Built-in LED work light and also a MagTray (which really helps keep those screws in one place).
Once I started using the tools, I realised that Ryobi products were not only affordable but also innovative with practical, intelligent features that makes it sought after by both novices and professionals alike.
Step 3:
Shopping for materials:
Thank God for Bunnings! Without the help of the amazing staff there, I could have landed in a bit of soup. From helping me pick out the right kind of wood to all the other supplies that I needed, they have been extremely helpful with their time and expertise.
While purchasing supplies, I would like to stress about the importance of investing in good quality safety materials like protective gloves, goggles, dust masks, overalls etc… Remember guys, safety comes first. Always!
Step 4:
Cutting and sawing:
I used treated pine for making this herb garden, all of which were purchased at Bunnings. So using the circular saw, all the wooden planks were cut into the desired sizes and measurements. I had to make adjustments to the measurements provided by Garden Answer to suit my needs and requirements.
Step 5:
Sanding:
As I already mentioned, the orbital sander was an extremely helpful tool as it required much lesser effort to other traditional methods. All the planks I used were sanded to perfection before being assembled.

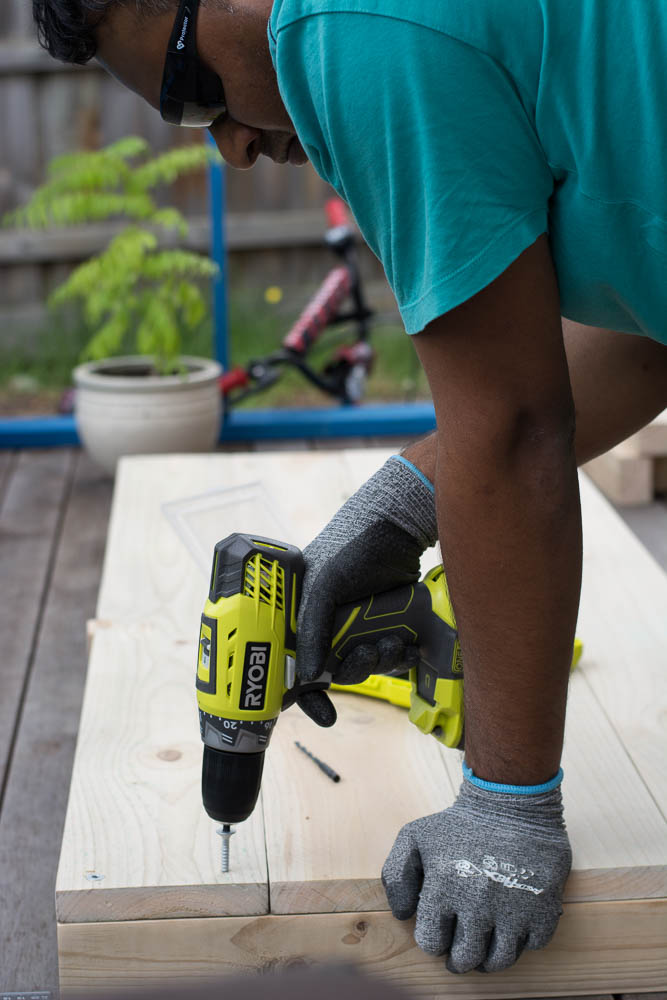
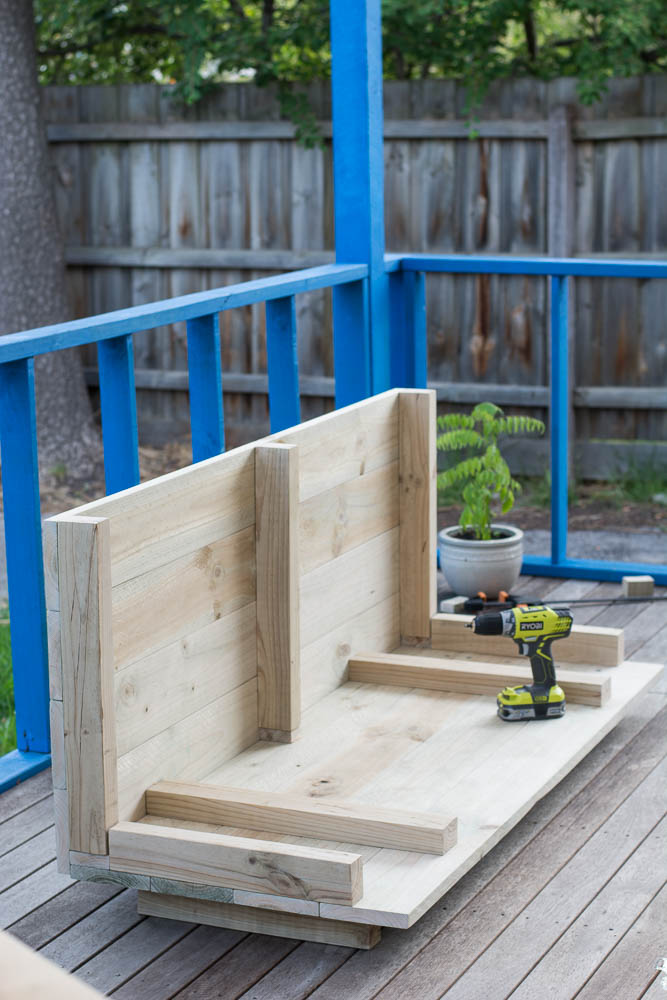
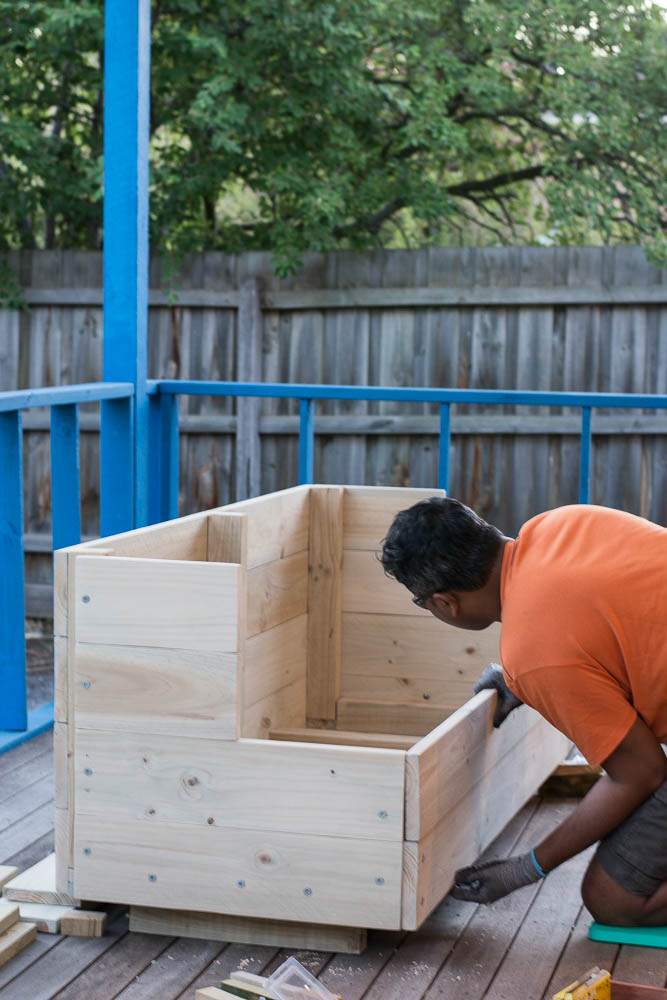
Step 6:
Assembling:
Using the drill set, I assembled the structure beginning at the base and then moving on to the backside, the sides and finally the front portion (as depicted in the pictures below).
Step 7:
Staining and Plastic Covering:
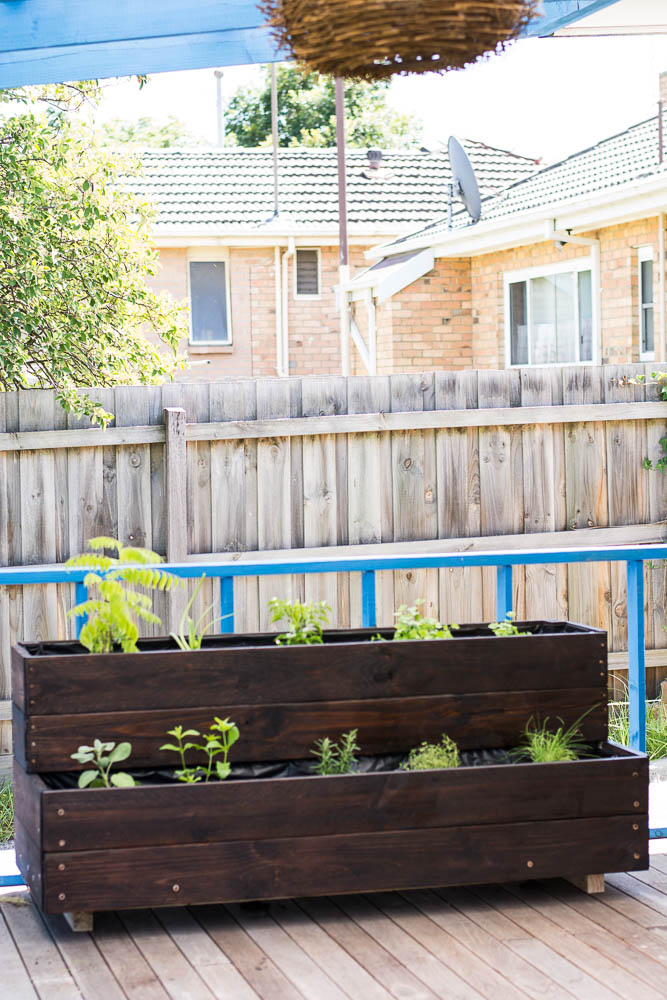
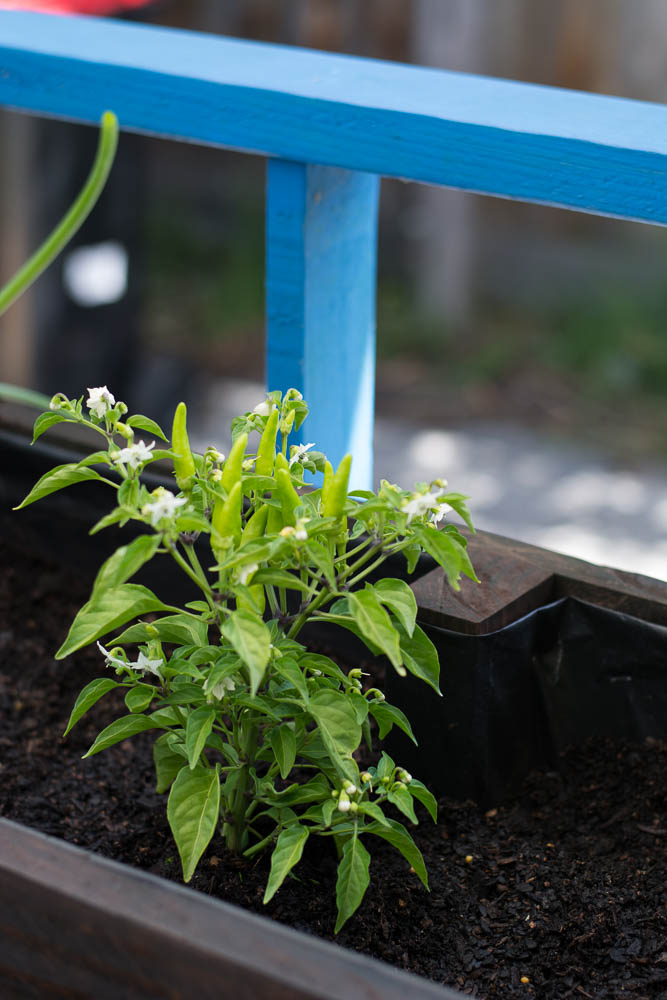
Since I wanted the unit to match the deck area, I decided to use a wood stain in walnut shade followed by clear varnish. And finally, a layer of black plastic sheet was attached to the insides of the unit so that the soil does not come into direct contact with the wood thus prolonging the life of the wooden herb garden.

Step 8:
Planting:
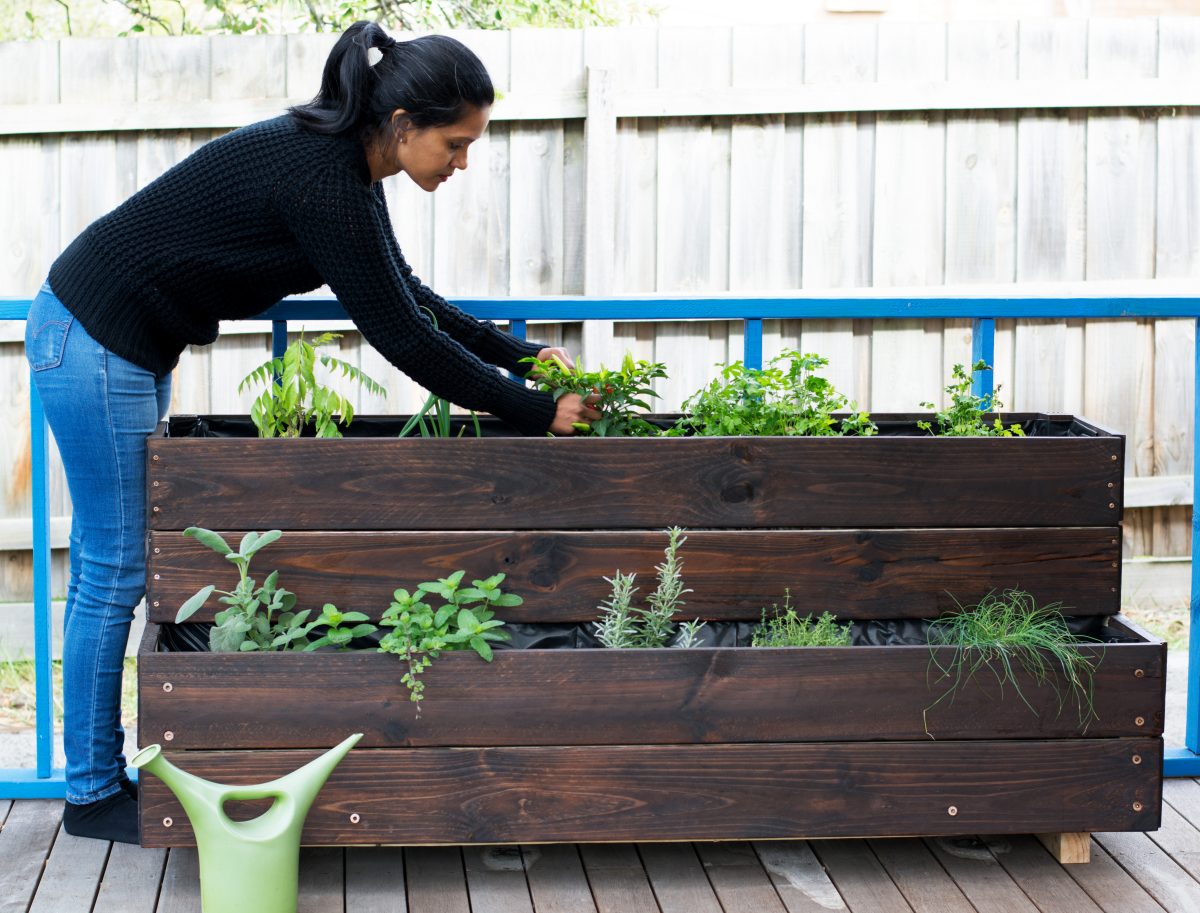
I filled the unit with a specialized vegetable herb potting mix and then it was time to plant the herbs. I bought a few new ones and re-planted some of the existing ones from pots. I intend to plant more herbs eventually but just to get started; I planted the curry leaves, chillies, coriander, parsley, sage, chives, mint, rosemary, spring onion and thyme.
Sheer Joy!
That’s the only way I can describe what I felt at the end of it. Something made by my own hands come to life….the sense of happiness is incomparable. And I am so encouraged by how easy it actually was albeit my apprehensions using the Ryobi power tools.
I can guarantee loads more DIY projects in the future.
Hope this post has inspired you to try out some DIY projects of your own and do not forget to tag #thespiceadventuress so that I can see it too.
And finally leaving you with my Top 5 Recipes using Herbs!
- Grilled Prawns with Herbs and Chillies
- Grilled Chicken Skewers (with Fresh Herbs and Chillies)
- Salsa Verde
- The Green Mojito
- Mint Coriander Chutney
Disclaimer – This post was brought to you in collaboration with Ryobi Tools. As mentioned, I was supplied with all the tools required for this project. The story, musings and all the hard work is entirely mine!
It’ a great symble of gardening . Good teaching about a garden tools. I’m really like it. Thanks for sharing.
Thanks so much Jimmy; much appreciated
Reblogged this on .
I have been using Ryobi cordless tools for about five years now and they have never let me down. Good post!
Thanks Jake, that’s great to hear. It’s so true that they are quite sturdy yet easy to use.
This is a lot of hard work. But incredible u took it up for the love of herbs. Inspiring 🙂
It was a bit challenging as I have never done something so big. But just as I wrote, the joy is beyond words. Thanks…..
Wow Dhanya! Looks amazing. great work
Thanks dear. Its the first time undertaking such a big one…feeling so happy and accomplished.